Once digital photographs have been taken off the camera and placed on the computer, many programs, like Adobe Photoshop, can be used to manipulate them. This is especially true for turning a color photograph into monochrome and then changing the contrast and relative lightness or darkness. I decided to use my Nikon D90 to show, in the manual setting, the difference the color filters can make when used in the camera in the monochrome setting. What is gained and lost with each approach? When is it appropriate to use?
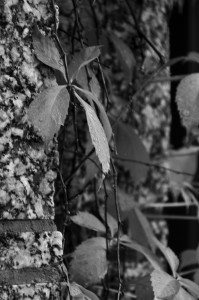
One a particularly gray, and therefore flat light, day in Minnesota, I took my camera out to capture shots. I took one with many elements from different distances; a tree and a building in the background. The other was a detail of some foliage on a marble wall. Each was taken in the same shot and within moments of each other.
In my camera, I am able to apply a yellow, orange, red and green filter. In a black and white photograph manipulated in the camera, a yellow, orange and red filter will up the relative contrast in the shot. The darks will become darker and the lights will become lighter. Yellow is the smallest amount of added contrast. Orange is the medium amount and red is a high amount of added contrast. A green filter will mostly lighten other greens but also add some more variation from one green to another. It can also add some more gray tones which is wonderful when shooting people, specifically the skin. It will add a lot of depth and roundness in the shape.
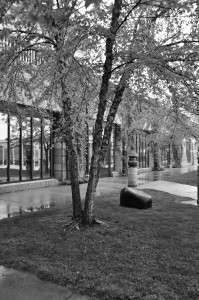
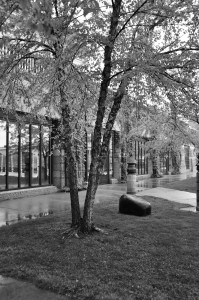
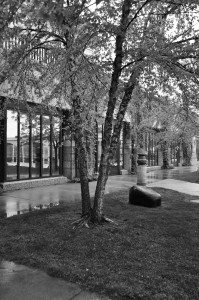
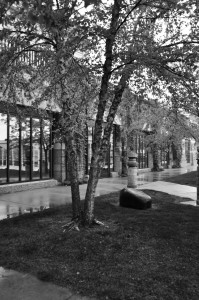
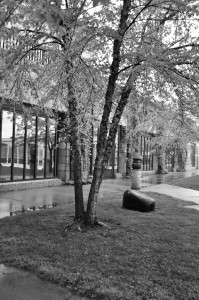
Here are the results from the shots of the tree and surrounding building:
No filter:
Yellow filter:
Orange filter:
Red filter:
Green filter:
The overall benefits of filters can be seen, especially if these images are looked at in detail. They add drama and some depth to the photographs. They also increase the visual interest by creating pockets of mysterious darkness and silhouetted lightness. But, they also can make the overall shot darker and often, decrease detail in some of the small parts of the photograph. These may not be visible at first sight, but with a trained eye and attention to detail, they can become obvious. From the first photograph with no filter to the one with the red filter, the strands of grass and the details in the bark of the tree have become lost. Many parts fall into the black and lose their interest. On the other hand, the photograph with the yellow filter is maybe not enough. On a low light day, this may not be enough added contrast to take away the flattened space. In this case, the orange filter may add the most visual excitement without losing some of the important details.
In the shot with the green filter, the greenness of the leaves gets lightened, and so the overall effect is a slightly flattened tree with no gradient. This may give an interesting contrast to the darkness of the tree bark but may also blend too much into the skyline.
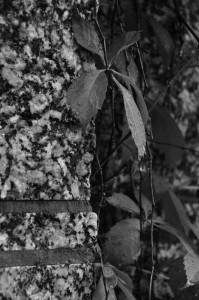
No filter:
Yellow filter:
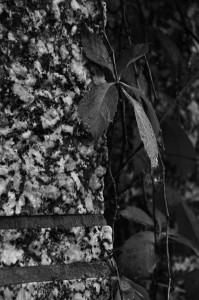
Orange filter:
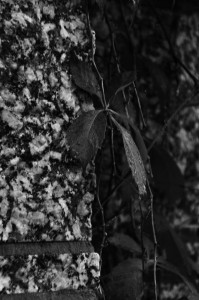
Red filter:
Green filter:
In these photographs which are more detail based, the change in filters is more dramatic. I purposely chose a dark corner where the change would be more obvious. From the image with no filter, to the one with a red filter, many of the subtle details are lost and the fine lines and edges of the leaves become blurred. The transitions also become lost when the gradient of grays loses its many transitions. On the other hand, the green filter offers a softness and lightness that was necessary to brighten up the details in general.
Many people have asked why some of these effects cannot be accomplished in the computer. The short answer is that they can. The reason I often do most of my work in the camera is because I believe that is where a sharp eye is required. The computer is tool and taking great shots comes from the eye of the photographer. This may be a purist way of approaching photographs and I have seen many photographers accomplish beautiful results when they transfer them to the computer. To me, the camera is a translation of what I am seeing and the computer does not substitute catching the right moment. This is only my opinion and it really comes down to what each person is most comfortable doing.
In conclusion, knowing when and where to use certain filters in a digital SLR takes practice and experimentation. Often, I will take the same shot several times with different filters and then compare what worked and what didn’t. This is the main way I have trained myself to understand the benefits and draw backs to each. Mainly, to add drama and higher contrast to an image, filters can be very effective. From yellow to red depends on how much you want to call out something in particular. Seeing how much contrast is in the shot anyway will help makes things more obvious. A red filter may really bring out the gradient of the sky and add definition to the clouds but may also make a building in the foreground darker and less detailed. A green filter may help add shades of gray to a close up of someone’s face and add variation from one green to another. It may also makes things too light in an image that is in low light. Always when in doubt, experiment, experiment, experiment!




Pingback: Douglas Exposes Ex-roommate De Vito As A Neat Freak | shoes
Pingback: Moss To Sell House | shoes
Pingback: Fox Is Pregnant | shoes